
The van is really for them. No, really! We want to be able to explore, to see, and to do, but we want to be able to make sure they’re safe. They’re not the adventurous type necessarily, and many places (National Parks) aren’t dog friendly. So, the van will afford us the ability to bring them with us, while keeping them safe and secure in a temperature-controlled environment when they can’t do it all with us.
But there is one huge caveat – we need a way to monitor the van to ensure that it is maintaining a safe temperature. We looked into a few of the multitude of options and came away with a short list – to start:
- Cellular options (e.g., Waggle)
- WiFi options (e.g., TempStick)
- DIY options
Cellular options
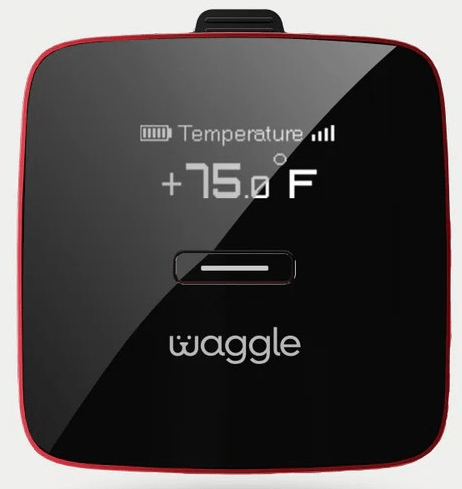
It’s impossible to search for solutions to keep pets safe in camper vans or RVs without seeing posts/ads/sites discussing Waggle. The Waggle Pet Monitor (listed $249 Lite version; $349 Pro version but regularly goes on sale for 50% off) provides real-time monitoring of temperatures and sends alerts to your phone when it detects temperatures outside of your set ranges. For us, there were two big negatives that caused us to look into alternative solutions:
- Cellular – Waggle works exclusively on Verizon cellular networks. No Verizon service; it will not work. There is no option to use WiFi connectivity, ever.
- Subscription – Due to it being cellular-based, it requires a monthly subscription. The cost varies depending upon how many months you pay for in advance. As of May 2024, monthly cost ranges from $16.60/mo for annual subscriptions to $29/mo for monthly subscriptions. Waggle notes that additional plan options may be available through the app.
WiFi options
There are numerous thermostats that will monitor temperatures and provide alerts if they have a WiFi connection. For this to work, the van needs, well, WiFi. There are a couple of options here, which could include using the van’s hotpsot – which would require cellular – a third-party hotspot – which would require cellular – or satellite internet, like Starlink.
For our needs, the hotspot option is preferable to Waggle because at least we can have multiple uses for that cellular plan, but the biggest issue is still present: what if a location doesn’t have cell service? [Yes, that’s also a problem if we”re away from the van and don’t have cell service or WiFi to check in or receive alerts.] So, to do this option “right,” we would need satellite internet and then share that through a WiFi connection. [More on that later.]
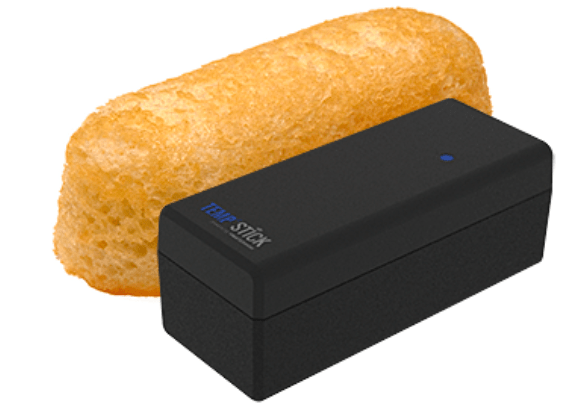
TempStick seems to be one of the leading WiFi thermostats. It offers real time temperature alerts and, as noted on the website, is the size of a Twinkie. More advanced options also have power outage notifications. Reviews seem to be a bit mixed on the TempStick – with users noting that it drops its connection and is not entirely reliable. For us, this one seems like it could work: it’s simple, small, and although it requires WiFi, that is something we could use for other purposes. In addition, it does not have any ongoing subscription requirements. ($149-$199 depending on model before $10 discount offered in May 2024.)
DIY options
Ultimately, if we want to remotely monitor the temperature of the van, some sort of internet connectivity will be required. Although Bluetooth options exist, we do not believe they are realistic solutions for our needs because absent an add-on router (that requires internet connectivity), they are accessible locally only. As mentioned above, we think the most robust option for internet connectivity will be Starlink, which offers Roam, permitting users to access high-speed internet “on the go.” Not only will it provide internet and WiFi in an all-in-one solution, it will give us internet when we’re out and about as well.

- The hardware starts at $599 for the standard kit with Gen 3 router.
- Monthly service starts at $150 for unlimited mobile data in a single country. Additional costs for priority data and for global usage.
Once we figure out the internet connectivity, then it’s just a matter of identifying the monitoring options. We want something that has multiple use application and are leaning towards the following (of course, we need to be mindful that all of these will contribute to battery drain):

HomePod Mini – With HomePod OS 10, Apple exposed the temperature and humidity sensors in the HomePods. Although there are no alerts, this information is easily accessible via the Home app (and even through Lock Screen widgets). We already have experience with this setup at home. The HomePods can also be used as hubs for other HomeKit products, and we shouldn’t forget their primary function: speakers with a small footprint and big sound. ($99 as of May 2024.)
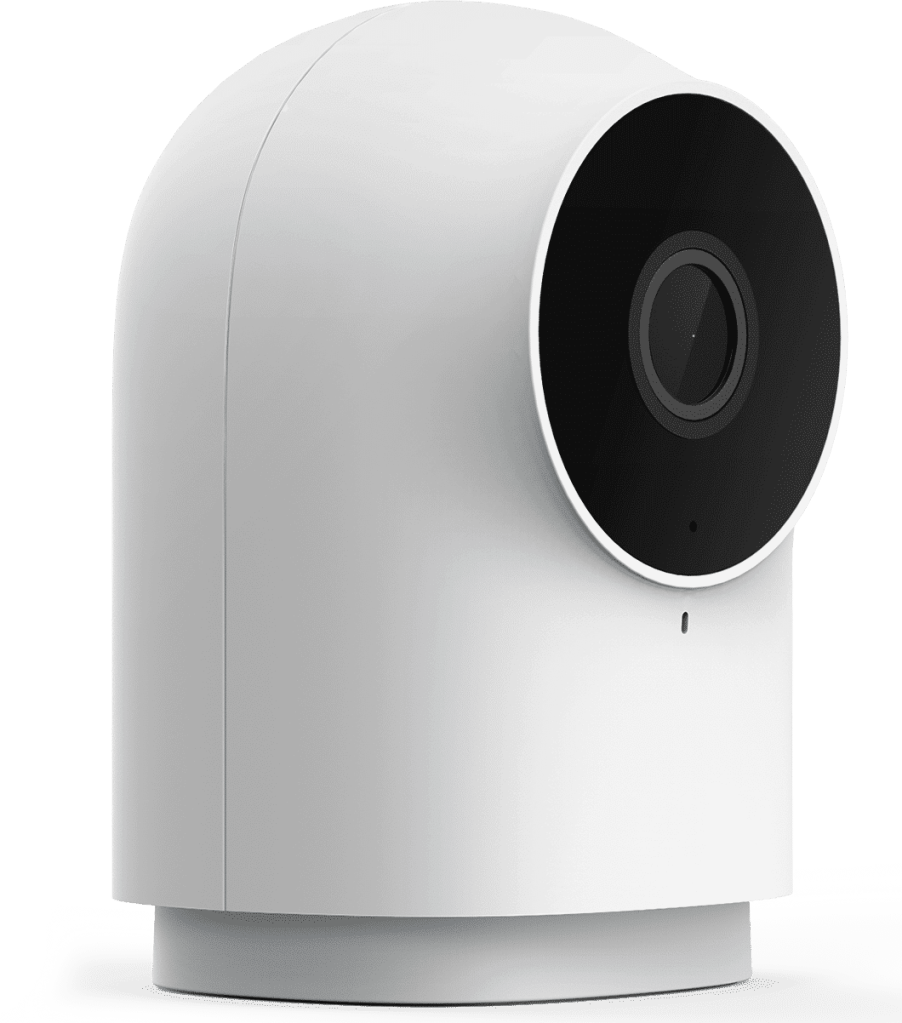
Aqara G2H Pro – Another device we are already use in our house, the camera is HomeKit compatible and will allow us to visually monitor and communicate with the pups while away from the van. In our experience, the cameras are stable and work well. ($56 on Amazon – but price and sales vary – as of May 2024.)
Starlink mounting options
We’re leaning towards what we’re calling the DIY setup. The question then becomes deploying Starlink – there are permanent flat mounts for the van’s roof even though the standard kit is intended to remain portable. Alternatively, the dish (affectionately referred to as “Dishy,”) has a built-in kickstand for portable use. There are also third-party storage options, like the SavageUTV Starlink cases.
We have learned that the Storyteller MODEs have a 12V auxiliary port on the roof that can be turned on and off from inside the van with the push of a button. This setup simplifies a rooftop installation – whether permanent or temporary.
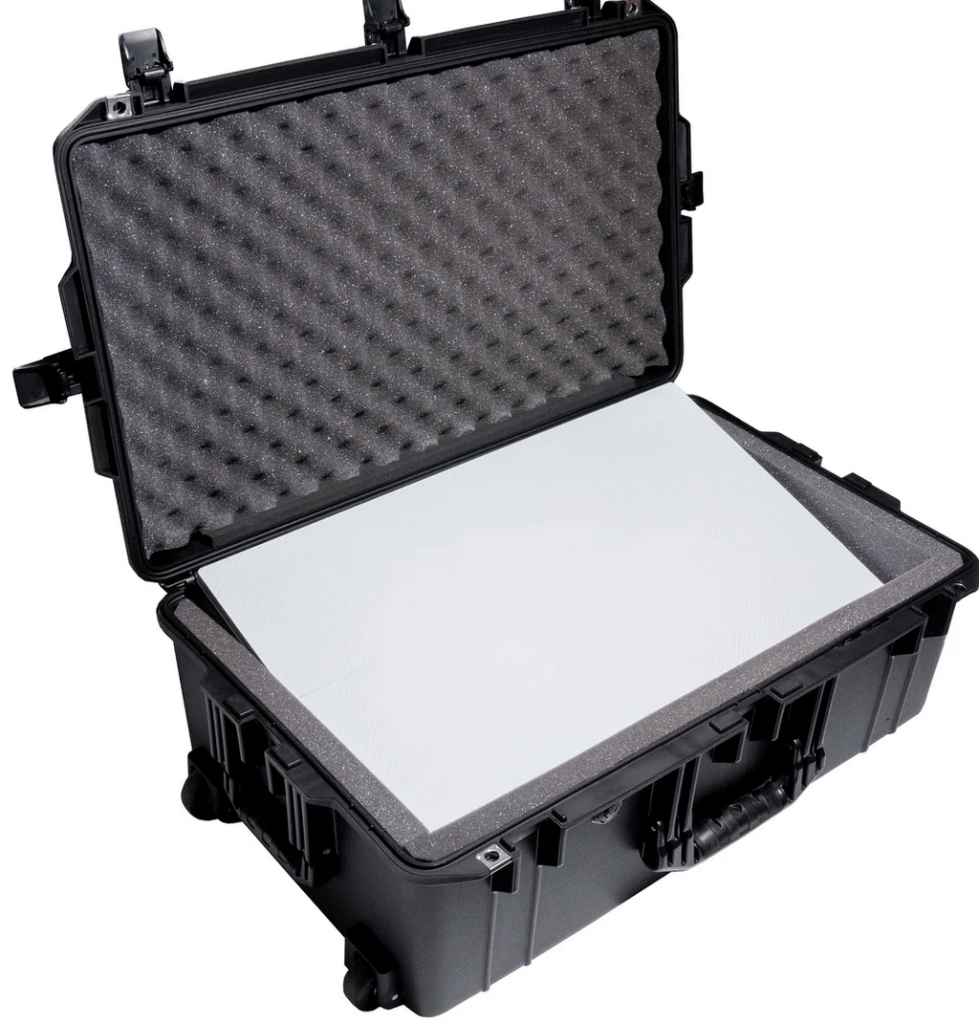
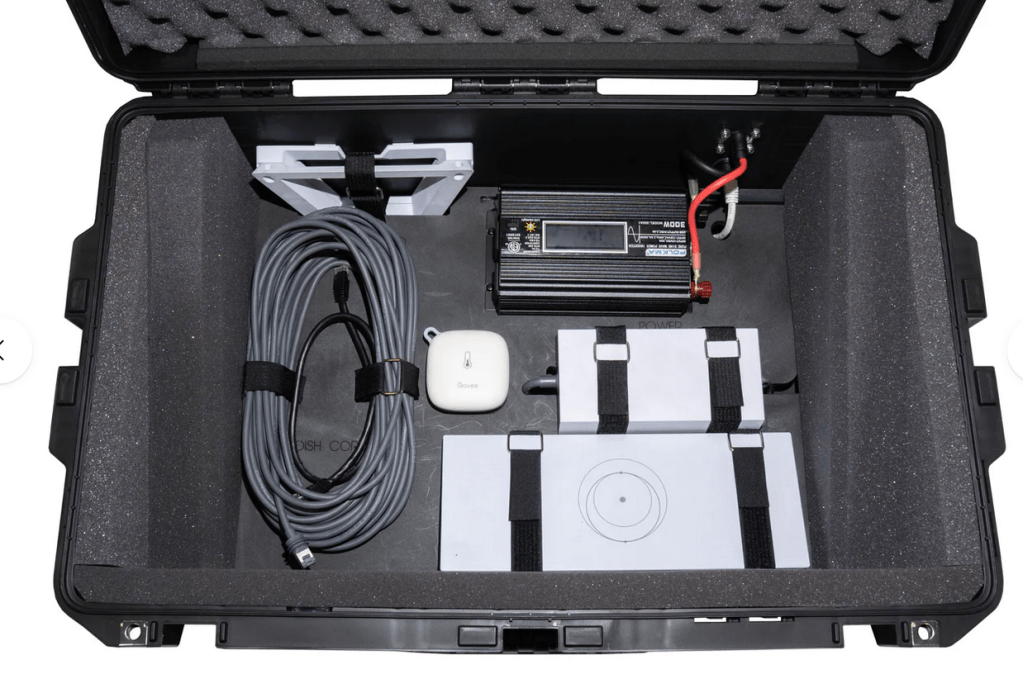
After seeing a few posts and thinking about our intended use, we are leaning towards the SavageUTV Starlink Standard, GEN 3 Roam Dish Case. In this modified Pelican case, SavageUTV has secure mounts for all the components of the Starlink system, including the power brick, router, Starlink-provided USB cable, and the dish. In addition, it can be used closed (with proper temperature monitoring, open, or with the dish on top of or adjacent to the case). With the addition of an optional 12V inverter, it is possible to also connect this storage solution to the rooftop auxiliary port (or just use it plugged into one of the 12V ports on the van itself). ($549.95 with optional upgrades ranging from $19.95 to $179.95.)

Leave a comment